

Making a Fiberglass Engine Cover
Tools used
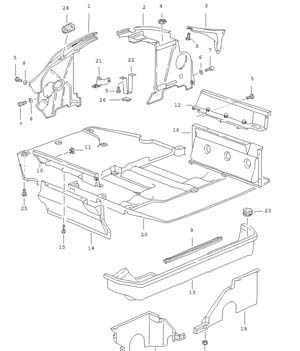
Engine cover part no. 20 is exposed to splashes and may deteriorate over time. The price listed in the original article is historical and needs to be updated. Before reproducing the part, verify that it does not serve any structural or thermal protection function that requires an approved material.
Overview
Engine cover part no. 20 is exposed to splashes and may deteriorate over time. The price listed in the original article is historical and needs to be updated. Before reproducing the part, verify that it does not serve any structural or thermal protection function that requires an approved material.

Explanation
The original article suggests using the old cover as a mold with fiberglass mat or fabric, polyester resin, and its hardener. The quantities listed are approximate: follow the product data sheets, prepare small batches, and ensure adequate ventilation to handle styrene and acetone fumes.

Explanation
Wear gloves compatible with the products, safety goggles, and respiratory protection suitable for organic vapors and fiber dust. Work away from any open flames or sparks. Place the old cover on trestles, apply the fabric, and then gradually saturate it, strictly following the manufacturer’s recommended dosage.

Explanation
Work in small areas to prevent the material from curing too quickly. After complete curing, deburr and drill while wearing respiratory protection, then check the fasteners, clearances, ventilation, heat resistance, and ensure there is no contact with the exhaust or moving parts.